My all time favourite breakfast or tea is Kaya & Butter on toast with a cup of my favourite blend of kopi o and gula melaka and on the side, some soft boiled eggs. Light, fulfilling and definitely, satisfying.
However, of the many kaya I have tried, nothing beats the homemade one that my mum made. Even the memory of it is enough to make me salivate.
I remember my mum used to make my sisters and I helped her stir her homemade kaya for hours on the stove with a wooden ladle while standing on a stool as we were still too short to reach the stove while she prepares lunch. It was tiring but the sweet aroma made us stirred even harder!
Whenever I miss home, I’ll make it at home but being the lazy me, i found the perfect way to shorten the cooking process while at the same time, maintain the silky smooth texture using only pure duck egg yolks, gula melaka, santan, salt and pandan juice. In fact, it’s creamier, less sweet yet still rich.
Perfect for a Quiet Weekend Breakfast
This kaya tastes absolutely heavenly and not only perfect for a quick breakfast or whenever you feel like snacking but also for making cakes and pastry fillings.
Ingredients:
- 400ml fresh coconut milk
- 180g gula melaka
- 4 pandan leaves, knotted
- 8 egg large duck yolks
- 1 teaspoon salt
Method:
- Wash the egg shells thoroughly. Separate the egg yolks and keep the egg whites for meringues or macarons.
- Beat the egg yolks till smooth and run it through a sieve to ensure no lumps. Set aside.
- Place the santan, gula melaka, salt, pandan juice and pandan leaves in a saucepan, heated over medium heat and cook until the sugar melts. ake sure the syrup is not boiling.
- Take the mixture off heat.
- Pour 1/4 of the mixture into the egg mixture and mix thoroughly.
- Pour that egg mixture into the rest of the coconut milk mixture and place it back on the stove. Heat on a medium low fire
- Continue to stir over medium low heat till the mixture starts to thicken. Stir continuously. It may still appear a bit runny, but it will continue to thicken once it cools down completely. Discard the pandan leaves.
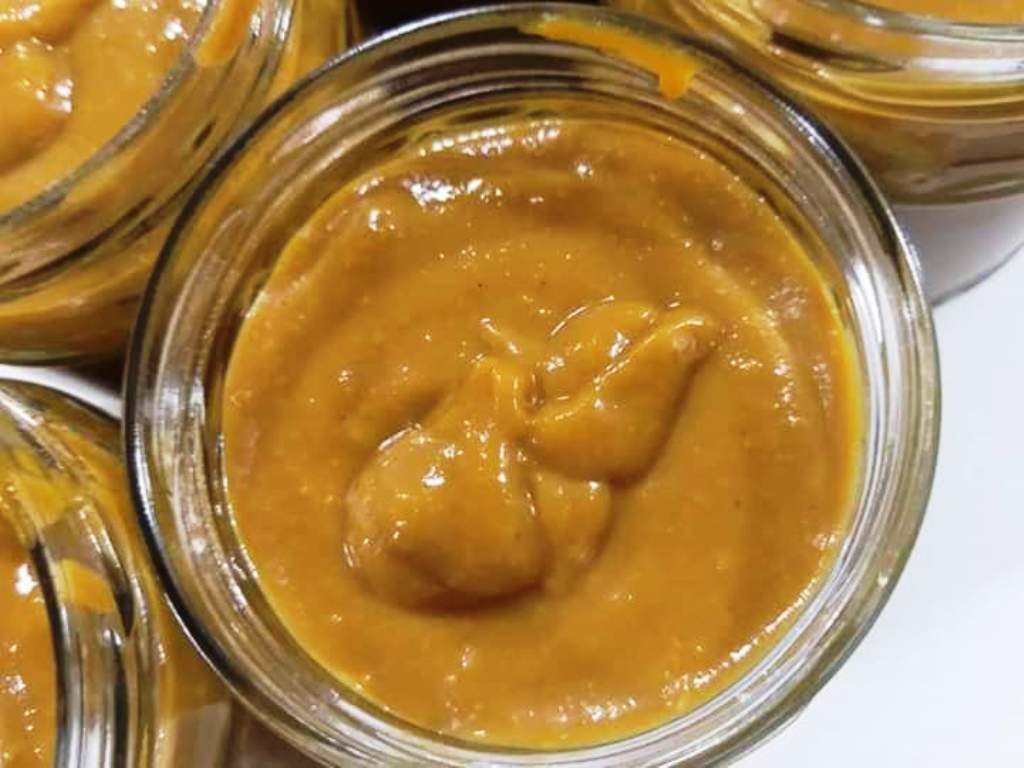
Storing Your Kaya
Once the kaya has cooled down completely, transfer to a sterilized glass jar and lid. Make sure the jars are boiled for 15 minutes to ensure the kaya stored can last longer.
Usually, the kaya made using this recipe can be stored in the refridgerator up to 1 week. I do not recommend freezing as they tend to separate.
Start Your Day Rich!
So, go to the nearest grocery store and get the ingredients to make this kaya. Trust me, once you tried this kaya, you won’t be satisfied with the store bought ones.
If you have any questions about this recipe, feel free to slide into my DM at @justinescakesandkueh. Don’t forget to catch more of my recipes at Butterkicap’s website and make sure you follow Butterkicap’s Instagram, Facebook and Twitter profiles to keep yourself updated when my new recipe is out!